Master the Art of Redstone: How to Build a Redstone Clock in Minecraft
Redstone clocks are the cornerstone of automation in Minecraft. Whether you're looking to power dispensers, create flashing lights, or build complex mechanisms, a redstone clock can help you achieve it all. In this guide, we’ll show you How to make a redstone clock, explore various designs, and share tips to maximize its efficiency.
Highlights
- Learn the basics of redstone clocks and their purpose in Minecraft.
- Explore different types of redstone clocks, from repeater to hopper designs.
- Step-by-step instructions to build your own redstone clock.
What Is a Redstone Clock in Minecraft?
A Redstone Clock in Minecraft is a device or circuit that produces a continuous, repeating signal. This signal can be used to automate various tasks, such as powering pistons, activating dispensers, or creating dynamic light displays. Redstone clocks are an essential component for players who want to create advanced redstone contraptions and improve the efficiency of their builds.
Redstone clocks come in various designs, from simple circuits using repeaters to more complex mechanisms involving hoppers and comparators. Their versatility and ease of customization make them a favorite tool for automating tasks and enhancing gameplay. Whether you’re a beginner or an experienced redstone engineer, mastering redstone clocks opens up endless possibilities for creativity and automation in Minecraft.
Types of Redstone Clocks
– Repeater Clock
- Description: A simple and beginner-friendly design that uses redstone repeaters and dust to create a loop.
- Best For: Basic automation and tasks with adjustable timing.
- Key Features:
- Easy to build and modify.
- Adjustable speed using repeater delays.
– Comparator Clock
- Description: A compact clock that leverages the properties of a redstone comparator to generate a rapid signal.
- Best For: Space-efficient designs requiring fast pulses.
- Key Features:
- Compact and fast.
- Ideal for tasks that need quick activations.
– Observer Clock
- Description: Uses observers to detect and react to changes in block states, creating a continuous signal.
- Best For: High-speed automation in tight spaces.
- Key Features:
- Extremely fast pulse generation.
- Great for compact builds.
– Piston Clock
- Description: A slower and mechanical clock that uses sticky pistons and redstone blocks to alternate signals.
- Best For: Tasks requiring slower and more reliable timing.
- Key Features:
- Reliable and visually engaging.
- Suitable for larger builds.
– Hopper Clock
- Description: A precise clock that uses hoppers to transfer items back and forth, controlling the signal duration.
- Best For: Long-duration timing or highly precise tasks.
- Key Features:
- Highly customizable timing by adjusting the number of items in hoppers.
- Useful for complex redstone contraptions.
Materials Needed to Make a Redstone Clock
– Repeater Clock
- Redstone Repeaters: At least 2, depending on the size of the loop.
- Redstone Dust: To connect the repeaters and complete the circuit.
- Lever or Button: To activate and control the clock.
– Comparator Clock
- Redstone Comparator: 1 comparator to create the clock mechanism.
- Redstone Dust: To loop the output back to the input.
- Lever or Button: For activating and stopping the clock.
– Observer Clock
- Observers: 2 observers to detect and emit signals.
- Redstone Dust: To connect the clock to other components.
- Building Blocks: Optional, for placing the observers.
– Piston Clock
- Sticky Pistons: 2 sticky pistons for the alternating mechanism.
- Redstone Dust: To connect the pistons.
- Redstone Blocks: 2 blocks to alternate signals.
- Building Blocks: To hold the pistons in place.
– Hopper Clock
- Hoppers: 2 hoppers to transfer items.
- Redstone Comparator: 1 comparator to detect item movement.
- Sticky Pistons: 2 pistons to move the redstone block.
- Redstone Dust: To connect the clock’s components.
- Redstone Block: 1 block for the pistons to move.
- Items: Any stackable items (e.g., blocks or seeds) to control timing.
Step-by-Step Guide to Building Redstone Clocks
Repeater Clock
Steps:
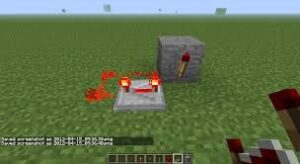
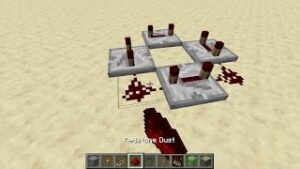
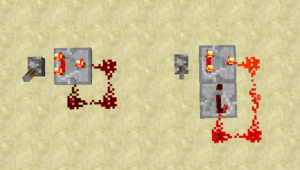
- Place the Repeaters: Arrange at least two redstone repeaters in a loop formation.
- Connect with Redstone Dust: Lay redstone dust to connect the output of each repeater to the next.
- Adjust Repeater Delays: Right-click the repeaters to adjust the delay for your desired clock speed.
- Activate the Clock: Power the circuit with a lever or button to start the clock.
Tips:
- Use multiple repeaters for slower clocks.
- Place the lever strategically for easy toggling.
Comparator Clock
Steps:
- Place the Comparator: Place the comparator with its output facing away.
- Connect Redstone Dust: Loop redstone dust from the output back to the input.
- Activate the Comparator: Use a lever or button to power the comparator, creating a rapid clock.
Tips:
- Ideal for small builds due to its compact size.
- Ensure the comparator is in subtraction mode (right-click it to toggle).
Observer Clock
Steps:
- Place the Observers: Place two observers facing each other so that their outputs connect.
- Connect with Redstone Dust: Attach redstone dust to the output of the observers.
- Start the Clock: The observers will immediately generate a rapid signal.
Tips:
- Use this for compact builds and fast signals.
- Add a lever to stop the clock if needed.
Piston Clock
Steps:
- Set Up Pistons: Place two sticky pistons facing each other with a gap in between.
- Add Redstone Blocks: Place redstone blocks on the pistons’ arms.
- Connect with Redstone Dust: Lay redstone dust to link the pistons in a loop.
- Activate the Clock: Power the pistons to start the clock.
Tips:
- Use this for slower, reliable signals.
- Ensure pistons are properly aligned to avoid jams.
Hopper Clock
Steps:
- Set Up Hoppers: Place two hoppers facing into each other (use shift-right-click).
- Add a Comparator: Place a redstone comparator with its output connected to one hopper.
- Position Sticky Pistons: Place pistons on either side of the hoppers with a redstone block between them.
- Insert Items: Place items into one hopper to control the clock’s timing.
- Connect with Redstone Dust: Use redstone dust to link the comparators and pistons.
Tips:
- Adjust the number of items in the hopper to change the clock’s duration.
- Ideal for long-duration or precise timing tasks.
Conclusion
Mastering redstone clocks in Minecraft opens the door to endless possibilities for automation, creativity, and gameplay enhancement. From simple repeater clocks to advanced hopper-based designs, these mechanisms can power your builds and bring your ideas to life. Whether you’re new to redstone or an experienced player, understanding how to make and optimize redstone clocks is a valuable skill that will elevate your Minecraft adventures.
Ready to build your first redstone clock? Download Minecraft today and start automating your world like a pro! For more guides, tips, and creative inspiration, follow APKAFE. Unleash your creativity and transform your Minecraft experience—start building now!
User Reviews


