How to Make a Redstone Lamp in Minecraft
Redstone lamps are a stylish and functional lighting option in Minecraft. Whether you’re adding modern lighting to your builds or automating light systems, redstone lamps are an essential tool. In this guide, we’ll explain How to make a redstone lamp, discuss its uses, and share tips for optimizing your designs.

Highlights
- Step-by-step guide to crafting and using redstone lamps.
- Tips for powering and integrating lamps into your builds.
- Creative applications for dynamic lighting in Minecraft.
What Is a Redstone Lamp in Minecraft?
A Redstone Lamp in Minecraft is a versatile block that emits light when powered by a redstone signal. Crafted using glowstone and redstone dust, this lamp combines functionality and aesthetics, making it ideal for both practical and decorative purposes. It’s often used in automated lighting systems, indicator mechanisms, and creative builds, allowing players to enhance their structures with dynamic, customizable illumination. Whether you’re creating modern interiors, automated farms, or synchronized light displays, a redstone lamp adds a touch of sophistication and innovation to any Minecraft world.
Materials Needed to Craft a Redstone Lamp
– Glowstone
- Where to Find: Glowstone is found in the Nether, typically hanging from ceilings or over lava pools.
- How to Harvest: Use a pickaxe enchanted with Silk Touch to obtain the full block, or mine it regularly to collect glowstone dust (four dust can be crafted into one glowstone block).
– Redstone Dust
- Where to Find: Mined from redstone ore blocks, which are commonly found between levels Y=1 and Y=16 in the Overworld.
- Additional Uses: Redstone dust is essential for crafting and powering various redstone components.
Crafting a Redstone Lamp
- Open the Crafting Table:
- Right-click or use the crafting table to access the 3×3 crafting grid.
- Place the Glowstone Block:
- Position the glowstone block in the center slot of the grid (middle row, middle column).
- Add Redstone Dust:
- Surround the glowstone block with redstone dust:
- Top slot (middle column).
- Bottom slot (middle column).
- Left slot (middle row).
- Right slot (middle row).
- Surround the glowstone block with redstone dust:
- Collect the Redstone Lamp:
- The crafted redstone lamp will appear in the result box. Drag it into your inventory.
How to Power a Redstone Lamp
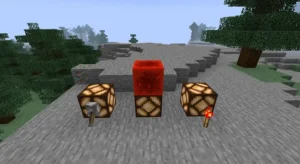
– Using a Redstone Torch
- How It Works: Place a redstone torch directly adjacent to the lamp.
- When to Use: Ideal for creating constant, always-on lighting.
- Tip: Hide the torch behind a block for a cleaner aesthetic.
– Using a Lever
- How It Works: Attach a lever to the lamp or an adjacent block. Flip the lever to toggle the lamp on or off.
- When to Use: Perfect for manual control of lighting in rooms or pathways.
- Tip: Use this setup for adjustable light settings.
– Using a Pressure Plate
- How It Works: Place a pressure plate near the lamp and connect it with redstone dust. When stepped on, the plate powers the lamp.
- When to Use: Best for automatic lighting triggered by players or mobs.
- Tip: Combine with a hidden redstone circuit for seamless functionality.
– Using a Button
- How It Works: Attach a button to the lamp or an adjacent block. Press the button to temporarily light the lamp.
- When to Use: Suitable for short bursts of light, such as for signaling or traps.
– Using Redstone Dust and Circuits
- How It Works: Place redstone dust to connect the lamp to a redstone signal source (e.g., a lever, button, or daylight sensor).
- When to Use: Ideal for complex setups requiring multiple lamps or synchronized lighting.
- Tip: Use redstone repeaters to extend the signal to distant lamps.
– Using a Daylight Sensor
- How It Works: Connect a daylight sensor to the lamp with redstone dust. The lamp turns on at night and off during the day.
- When to Use: Perfect for automatic streetlights or outdoor lighting.
Applications of Redstone Lamps in Minecraft
– Functional Lighting
- Illuminate Interiors: Use redstone lamps to light up rooms, corridors, and storage areas with style.
- Outdoor Lighting: Place lamps along pathways, bridges, or gardens for enhanced visibility and ambiance.
- Dynamic Light Sources: Create interactive lighting that turns on and off based on player actions.
– Indicator Systems
- Farm Status: Signal when an automatic farm is active or when crops are ready for harvest.
- Machine Feedback: Use lamps as visual indicators for operational machines or redstone contraptions.
- Storage Signals: Highlight filled or empty chests in storage systems.
– Automated Streetlights
- Day/Night Sensors: Pair redstone lamps with daylight sensors to create lights that turn on at night and off during the day.
- Smart Cities: Add realistic lighting to Minecraft towns, villages, or cities for immersive builds.
– Decorative Builds
- Stylish Patterns: Use redstone lamps in floor or wall designs to create stunning patterns.
- Festive Decorations: Incorporate lamps into holiday-themed builds for glowing accents.
- Artistic Creations: Combine lamps with stained glass for colorful, illuminated art.
– Synchronization with Redstone Contraptions
- Traps and Alarms: Signal when traps are triggered or alarms are activated.
- Interactive Doors: Light up entrances when powered by pressure plates or buttons.
- Timed Events: Combine lamps with redstone clocks for pulsing or flashing effects.
How to Make an Automatic Night Light in Minecraft
Materials Needed
- Redstone Lamp:
- Crafted with 1 glowstone block and 4 redstone dust.
- Daylight Sensor:
- Crafted with 3 glass blocks, 3 nether quartz, and 3 wooden slabs.
- Redstone Dust:
- Used to connect the daylight sensor to the redstone lamp.
- Building Blocks (Optional):
- Used to create a housing or base for the light.
Step-by-Step Guide to Building an Automatic Night Light
– Place the Redstone Lamp
- Choose a spot for your night light, such as a pathway, garden, or room.
- Place the redstone lamp on the ground or a pillar.
– Install the Daylight Sensor: Place the daylight sensor next to the redstone lamp or on top of a nearby block.
– Connect with Redstone Dust
- Lay redstone dust between the daylight sensor and the redstone lamp.
- Ensure the redstone dust forms a continuous path without gaps.
– Test the Setup
- Wait for nighttime in the game or set the time to night using commands (/time set night) to test the lamp.
- The lamp should light up automatically when it’s dark and turn off during the day.
Optional Enhancements
– Protect the Circuit: Encase the daylight sensor and redstone dust in building blocks to protect them from accidental damage or mobs.
– Add Multiple Lamps: Use additional redstone dust and repeaters to connect multiple lamps to a single daylight sensor.
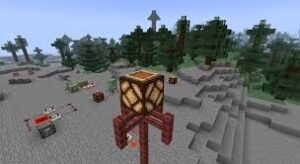
– Aesthetic Design: Integrate the lamp and sensor into stylish lampposts or decorative builds for a polished look.
Benefits of an Automatic Night Light
- Hands-Free Lighting: No need to manually turn lights on or off.
- Realistic Ambiance: Adds a touch of realism to pathways, gardens, or towns.
- Energy Efficiency: The lamp only activates when needed, saving resources in creative builds.
Conclusion
Redstone lamps are an essential element for combining functionality and aesthetics in Minecraft. Whether you’re illuminating your base, designing automated lighting systems, or adding decorative flair to your builds, mastering the use of redstone lamps can elevate your gameplay. With simple materials and creative applications, redstone lamps bring a new dimension to your Minecraft adventures.
Ready to light up your Minecraft world? Download Minecraft today and start crafting your own redstone lamps! For more expert tips, creative ideas, and in-depth guides, follow APKAFE. Explore the endless possibilities of redstone engineering and make your builds shine—start now!
User Reviews


