Explore our comprehensive review and tutorial for Splice Video Editor. Discover its key features, usability, pros and cons, and learn how to make the most out of this powerful video editing app. Perfect for social media enthusiasts, vloggers, and casual video editors.
- Intuitive and user-friendly interface
- A comprehensive set of editing tools suitable for various needs
- High-quality filters and effects
- Affordable pricing model (mention free version and premium features)
- Excellent for social media content creation
- Limited advanced features compared to professional editing software
- Watermark on videos in the free version
- Ads in the free version may interrupt the editing process

Splice Video Editor: An In-Depth Review and Step-by-Step Guide
Splice Video Editor has quickly become a favorite among social media enthusiasts, vloggers, and casual video editors thanks to its intuitive design and powerful features. Developed by GoPro, Splice offers a user-friendly interface, a wide range of editing tools, and seamless integration with social media platforms. In this article, we provide an in-depth review of Splice Video Editor, covering its key features, performance, and user feedback. Additionally, we offer a step-by-step tutorial to help you master this app and create stunning videos effortlessly. Read on to learn why Splice is the go-to choice for many content creators.
Maybe you are looking for: the best video editing software
Introduction
Brief Overview of Splice as a Popular Video Editing App
Splice Video Editor is a highly regarded video editing app developed by GoPro, known for its powerful yet easy-to-use features. It has quickly gained popularity among content creators for its ability to deliver professional-quality videos without the need for advanced editing skills or expensive software.
Target Audience: Social Media Enthusiasts, Vloggers, and Casual Video Editors
Splice is designed to cater to a diverse audience, including social media enthusiasts who want to enhance their online presence with engaging videos, vloggers looking to create high-quality content for their channels, and casual video editors who seek a user-friendly tool to polish their home videos and share them with friends and family.
Purpose of the Review
The purpose of this review is to provide a comprehensive analysis of Splice Video Editor. We will explore its key features, assess its usability, discuss its pros and cons, and evaluate its overall performance. Additionally, we will provide a step-by-step tutorial to help you get started with Splice and make the most of its capabilities. Whether you are a seasoned content creator or a beginner looking to dive into video editing, this review will help you understand what Splice has to offer and how it can meet your video editing needs.
Section 1: Overview of Splice Video Editor
Introduction to Splice and Its Main Functionalities
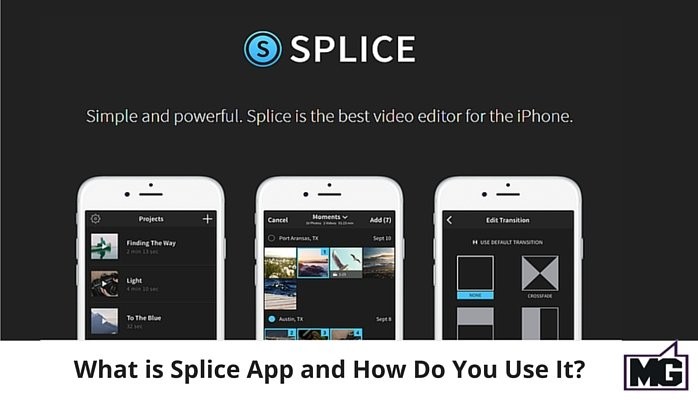
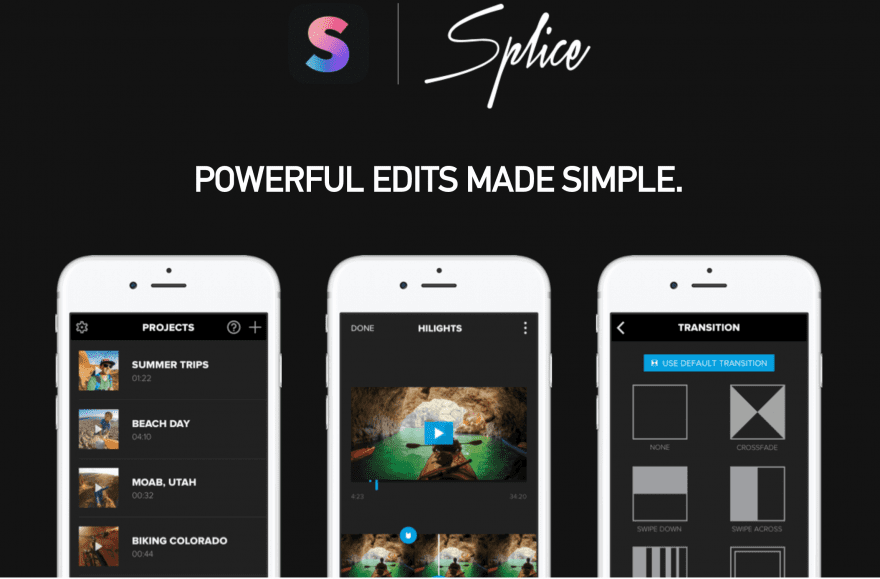
Splice Video Editor is a versatile and powerful video editing app designed to simplify the editing process for users of all skill levels. Developed by GoPro, Splice offers a comprehensive set of tools that allow users to trim, cut, and merge video clips, add text and overlays, apply filters and effects, and include background music or sound effects. The app’s user-friendly interface makes it easy for anyone to create professional-looking videos quickly and efficiently.
Brief History and Development by GoPro
Originally created as an independent app, Splice was acquired by GoPro to enhance their suite of video editing tools. Since the acquisition, GoPro has continued to develop and refine Splice, integrating their expertise in capturing high-quality video content. The app has benefited from regular updates and improvements, incorporating user feedback to make the editing process as smooth and intuitive as possible.
Importance of Easy-to-Use Video Editing Tools for Content Creators
In today’s digital age, video content is a crucial element of online presence and engagement. For social media enthusiasts, vloggers, and casual video editors, having access to easy-to-use video editing tools is essential. Splice addresses this need by providing a powerful yet accessible platform that allows users to create polished, engaging videos without requiring advanced technical skills. The app’s intuitive design and robust features enable content creators to focus on storytelling and creativity, rather than getting bogged down by complex editing processes.
By offering a seamless and efficient editing experience, Splice empowers users to produce high-quality video content that can captivate audiences across various social media platforms. Whether you’re editing a quick clip for Instagram, crafting a vlog for YouTube, or putting together a highlight reel, Splice provides the tools you need to bring your vision to life.
Section 2: Key Features of Splice Video Editor
User-Friendly Interface
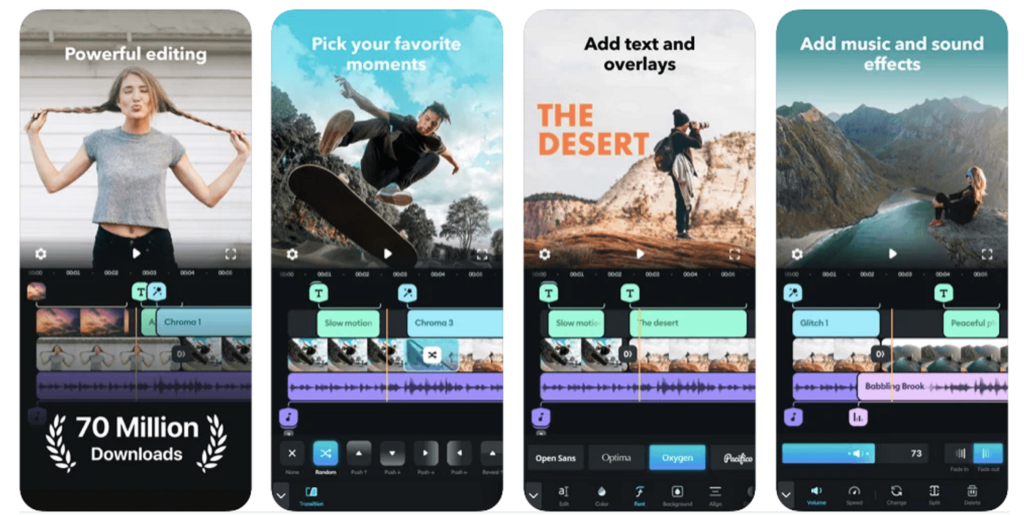
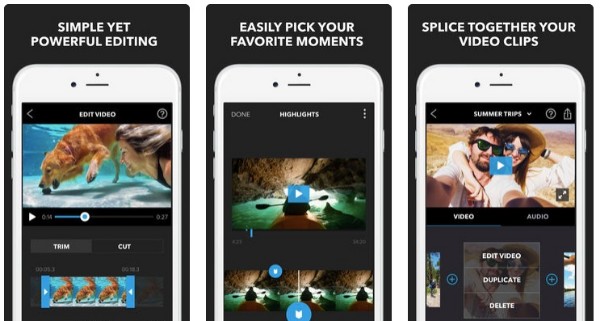
Description of the Interface Layout and Ease of Use Splice Video Editor boasts a clean and intuitive interface designed to make video editing accessible to everyone. The main screen displays a timeline where users can easily drag and drop video clips, images, and audio files. The toolbar provides quick access to essential editing tools, and the preview window allows users to see changes in real-time. Icons and menus are clearly labeled, ensuring that users can navigate the app without confusion.
Accessibility for Beginners One of Splice’s standout features is its accessibility for beginners. The app offers helpful tutorials and guides that walk new users through the basics of video editing. The interface is designed to be straightforward, minimizing the learning curve and allowing users to start creating content right away. Whether you’re new to video editing or just looking for a simple tool, Splice makes it easy to achieve professional results.
Editing Tools
Basic Editing Tools: Trimming, Splitting, Merging Splice provides a comprehensive set of basic editing tools that allow users to trim unwanted sections from their videos, split clips into smaller segments, and merge multiple clips into a single video. These tools are easy to use, enabling users to quickly refine their footage and create smooth, cohesive videos.
Advanced Tools: Transitions, Text Overlays, Filters, and Effects In addition to basic editing functions, Splice offers advanced tools that enhance the overall quality of your videos. Users can apply transitions between clips to ensure seamless changes, add text overlays to provide context or titles, and use filters and effects to enhance the visual appeal. These features allow for greater creativity and customization, helping users create unique and engaging content.
Music and Audio Editing
Adding Background Music and Sound Effects Sound is a crucial element of video content, and Splice excels in this area by providing a robust set of audio editing tools. Users can add background music from their library or choose from Splice’s selection of royalty-free tracks. Additionally, sound effects can be incorporated to enhance the viewing experience.
Synchronizing Audio with Video Clips Splice makes it easy to synchronize audio with video clips, ensuring that music and sound effects align perfectly with the visual elements. Users can adjust the timing and volume of audio tracks to match the mood and pace of their videos, resulting in a polished and professional final product.
Export Options
Various Export Resolutions and Formats Splice offers flexible export options to suit different needs and platforms. Users can choose from various resolutions and formats, ensuring that their videos are optimized for playback on different devices. Whether you’re creating content for social media, YouTube, or personal viewing, Splice provides the necessary export settings to achieve the best quality.
Direct Sharing to Social Media Platforms To streamline the sharing process, Splice includes direct sharing options for popular social media platforms like Instagram, Facebook, and YouTube. This feature allows users to publish their edited videos directly from the app, saving time and effort. With just a few taps, your polished video can be shared with your audience, ready to engage and captivate.
In summary, Splice Video Editor offers a rich set of features designed to make video editing both accessible and powerful. Its user-friendly interface, comprehensive editing tools, advanced audio capabilities, and flexible export options make it an ideal choice for anyone looking to create high-quality video content quickly and easily.
Section 3: Performance and Usability
Ease of Use
Learning Curve for New Users Splice Video Editor is designed with user-friendliness in mind, making it easy for beginners to start editing videos without a steep learning curve. The intuitive layout and clearly labeled tools ensure that even those with no prior editing experience can navigate the app comfortably. New users can quickly grasp the basics, thanks to the straightforward design and accessible interface.
Availability of Tutorials and Help Resources To further assist users, Splice provides a range of tutorials and help resources. These include in-app guides, video tutorials, and a comprehensive FAQ section. Users can easily access these resources to learn how to use different features and troubleshoot any issues they might encounter. This support system makes the editing process smoother and more enjoyable for beginners and experienced users alike.
Editing Experience
Responsiveness and Smoothness During Editing Splice delivers a responsive and smooth editing experience. The app is designed to handle real-time edits without significant delays, allowing users to see the effects of their changes immediately. This responsiveness enhances the overall editing process, making it more efficient and enjoyable.
Handling of Large Video Files Splice is capable of handling large video files with ease. Whether you’re working with high-definition footage or lengthy clips, the app performs well without noticeable lag. This capability is particularly beneficial for users who need to edit high-quality videos for professional or personal projects.
Performance
App Stability and Any Issues with Crashes or Bugs Splice is generally stable and reliable, with minimal reports of crashes or bugs. The developers regularly update the app to fix any issues and improve performance, ensuring a smooth and consistent user experience. However, like any software, occasional glitches may occur, but they are typically resolved quickly through updates.
Speed of Rendering and Exporting Videos One of Splice’s standout features is its fast rendering and exporting speeds. Users can expect quick processing times, even for complex edits and high-resolution videos. This efficiency allows for rapid turnaround, enabling users to share their finished projects promptly. The app’s ability to render and export videos quickly without compromising quality makes it a valuable tool for content creators who need to produce and distribute videos on a tight schedule.
In summary, Splice Video Editor excels in performance and usability, providing a user-friendly interface, responsive editing experience, and reliable performance. Its ability to handle large files and fast rendering times make it an ideal choice for anyone looking to create high-quality video content efficiently.
Section 4: Pros and Cons
Pros | Cons |
Intuitive and user-friendly interface | Limited advanced features compared to professional editing software |
A comprehensive set of editing tools suitable for various needs | Watermark on videos in the free version |
High-quality filters and effects | Ads in the free version may interrupt the editing process |
Affordable pricing model (mention free version and premium features) | |
Excellent for social media content creation |
Pros
- Intuitive and User-Friendly Interface: Splice offers a clean and easy-to-navigate interface, making it accessible to users of all experience levels. The layout is designed to be straightforward, minimizing the learning curve for beginners.
- Comprehensive Set of Editing Tools Suitable for Various Needs: Splice provides a wide range of editing tools, from basic trimming and splitting to advanced transitions, text overlays, and special effects. This versatility allows users to create professional-quality videos with ease.
- High-Quality Filters and Effects: The app includes a variety of high-quality filters and effects that can enhance the visual appeal of your videos. These tools help users achieve a polished and professional look without needing advanced editing skills.
- Affordable Pricing Model: Splice offers a free version with essential features and a premium version that unlocks additional tools and removes ads. The premium features are available at an affordable price, making it accessible to a broad audience.
- Excellent for Social Media Content Creation: With its user-friendly tools and quick export options, Splice is ideal for creating engaging content for social media platforms. Users can easily share their videos directly to Instagram, Facebook, YouTube, and other social networks.
Cons
- Limited Advanced Features Compared to Professional Editing Software: While Splice offers a robust set of tools for casual and intermediate users, it lacks some of the advanced features found in professional editing software like Adobe Premiere Pro or Final Cut Pro. Users looking for multi-track editing, advanced color correction, or detailed audio editing might find Splice insufficient.
- Watermark on Videos in the Free Version: The free version of Splice includes a watermark on exported videos, which can be a drawback for users who want to create clean, professional-looking content without branding.
- Ads in the Free Version May Interrupt the Editing Process: Users of the free version may experience interruptions due to ads. While this is a common trade-off for free apps, it can be frustrating for those looking to work uninterrupted.
By presenting the pros and cons in a clear and concise manner, readers can easily assess whether Splice Video Editor meets their specific needs and preferences.

Section 5: Comparison with Other Video Editing Apps
Brief Comparison with Similar Apps
To help you understand how Splice Video Editor stands out from its competitors, here’s a comparison with similar video editing apps like InShot, KineMaster, and Adobe Premiere Rush.
Feature/Aspect | Splice | InShot | KineMaster | Adobe Premiere Rush |
User Interface | Intuitive and user-friendly | Simple and easy to navigate | Professional look with more complex tools | Clean and modern, more professional tools |
Basic Editing Tools | Trimming, splitting, merging | Trimming, splitting, merging | Trimming, splitting, merging, multi-layer editing | Trimming, splitting, merging, multi-layer editing |
Advanced Editing Tools | Transitions, text overlays, filters, and effects | Filters, effects, text, stickers | Chroma key, blending modes, advanced transitions | Advanced transitions, color correction, audio tools |
Music and Audio Editing | Add music, and sound effects, sync audio with video | Add music, sound effects, voiceovers | Add multiple audio tracks, voiceovers | Advanced audio tools, voiceovers, sound effects |
Export Options | Various resolutions and formats | Various resolutions and formats | Various resolutions and formats | Various resolutions and formats |
Direct Social Media Sharing | Yes | Yes | Yes | Yes |
Platform Availability | iOS, Android | iOS, Android | iOS, Android | iOS, Android, Windows, MacOS |
Pricing | Free with ads and watermark, affordable premium | Free with ads and watermark, affordable premium | Free with ads and watermark, subscription options | Subscription-based, free limited version |
Unique Features | Easy-to-use interface, seamless GoPro integration | User-friendly for beginners | Professional-grade features, multi-layer editing | Professional tools, cross-device syncing |
Where It Excels | Social media content creation | Quick edits for social media | Advanced editing for detailed projects | Professional editing on the go |
Where It Falls Short | Limited advanced features | Limited advanced features | The steeper learning curve for beginners | Higher cost, more complex for casual users |
Highlighting Unique Features of Splice and Areas Where It Excels or Falls Short
Unique Features of Splice:
- Seamless Integration with GoPro: Splice is developed by GoPro, which means it offers seamless integration with GoPro devices, making it easy to import and edit footage directly from your GoPro camera.
- User-Friendly Interface: Splice is known for its intuitive and straightforward interface, which is ideal for beginners and those who prefer a simple editing process.
- Social Media Focus: The app is particularly well-suited for creating content for social media platforms, thanks to its quick export options and direct sharing capabilities.
Where Splice Excels:
- Ease of Use: Splice’s interface is designed to be user-friendly, allowing users to quickly learn and navigate the app.
- Comprehensive Set of Tools: While it may not have the advanced features of professional software, Splice offers a robust set of tools that cater to most casual and intermediate editing needs.
- Affordable Pricing: Splice provides a free version with essential features and an affordable premium version that unlocks additional tools and removes ads.
Where Splice Falls Short:
- Limited Advanced Features: Compared to professional editing software like Adobe Premiere Rush, Splice lacks some advanced tools such as multi-track editing and advanced color correction.
- Ads and Watermarks: The free version includes ads and watermarks, which can be a drawback for users seeking a more professional output without any branding.
In summary, while Splice is a powerful and user-friendly video editing app suitable for most users, it may not meet the needs of those looking for advanced editing capabilities found in professional software. However, its seamless integration with GoPro, ease of use, and focus on social media content creation make it an excellent choice for beginners and casual editors
Section 6: User Feedback and Ratings
Summary of User Reviews and Ratings from App Stores and Review Sites
To provide a comprehensive overview of user experiences with Splice Video Editor, we have gathered feedback from various app stores and review sites. Below is a summary of the common praises and complaints from users, along with overall user satisfaction and recommendations.
Source | Average Rating | Common Praises | Common Complaints |
Apple App Store | 4.7 stars | - Easy-to-use interface | - Ads in the free version |
- Comprehensive editing tools | - Watermark on videos in the free version | ||
- Seamless integration with GoPro | - Occasional performance issues with large files | ||
Google Play Store | 4.5 stars | - User-friendly and intuitive | - Limited advanced features |
- High-quality filters and effects | - Ads in the free version | ||
- Quick export and sharing options | - Watermark on videos in the free version |
Common Praises from Users:
- Easy to Use Interface: Many users appreciate the intuitive and straightforward interface, which makes it easy to navigate and use.
- Comprehensive Editing Tools: Users value the wide range of editing tools available, including trimming, splitting, merging, and adding filters and effects.
- Seamless Integration with GoPro: GoPro users find the integration with their devices particularly beneficial, making it easy to import and edit footage.
- High-Quality Filters and Effects: The filters and effects are often praised for enhancing the visual appeal of videos.
- Quick Export and Sharing Options: Users enjoy the ability to quickly export and share their videos directly to social media platforms.
Common Complaints from Users:
- Ads in the Free Version: Ads can interrupt the editing process, which some users find frustrating.
- Watermark on Videos in the Free Version: The watermark on videos can be a drawback for those looking to create professional-looking content without branding.
- Limited Advanced Features: Some users feel that Splice lacks the advanced editing capabilities found in professional software.
- Occasional Performance Issues: There are occasional reports of bugs and crashes, particularly when handling large video files.
Overall User Satisfaction and Recommendations:
Overall, user satisfaction with Splice Video Editor is high, especially among beginners and casual editors. The app’s user-friendly interface, comprehensive set of tools, and seamless integration with GoPro make it a popular choice for social media content creation. While the free version’s ads and watermarks can be a drawback, the affordable premium version offers a compelling upgrade option. For those seeking more advanced features, however, professional editing software may be a better fit.
Recommendations:
- For Beginners and Casual Editors: Highly recommended due to its ease of use and wide range of basic and intermediate editing tools.
- For Social Media Enthusiasts: Ideal for quick and efficient social media content creation with direct sharing options.
- For Advanced Editors: May not meet all advanced editing needs; consider using it alongside more professional-grade software for complex projects.
Section 7: Step-by-Step Tutorial on Using Splice Video Editor
Getting Started
How to Access the Editor from the Splice App
- Download and Install: First, download and install the Splice app from the App Store or Google Play Store.
- Open the App: Launch the Splice app on your device.
- Create a New Project: Tap the “+” icon to start a new project. You can choose to create a new video by selecting photos and videos from your gallery or capturing new footage using the in-app camera.
Editing Photos and Videos
Step-by-Step Guide on Using Basic and Advanced Tools
- Trimming and Splitting Clips:
- Select a Clip: Tap on the video clip in the timeline.
- Trim: Drag the handles at the beginning and end of the clip to trim unwanted parts.
- Split: Position the playhead where you want to split the clip and tap the “Split” button.
- Merging Clips:
- Add Clips to Timeline: Drag additional clips to the timeline to merge them into a single sequence.
- Arrange Clips: Reorder clips by dragging them within the timeline.
- Adding Transitions:
- Select Transition Point: Tap on the transition point between two clips.
- Choose Transition: Select a transition style from the menu (e.g., fade, slide).
- Adjust Duration: Set the duration of the transition using the slider.
- Text Overlays and Titles:
- Add Text: Tap the “Text” icon and select “Add Text”.
- Type Text: Enter your desired text and choose a font, color, and style.
- Position Text: Drag the text box to position it on the screen.
- Applying Filters and Effects:
- Select Clip: Tap on the clip you want to edit.
- Apply Filter: Tap the “Filter” icon and choose from various filters to enhance your video.
- Adjust Effects: Use sliders to adjust brightness, contrast, saturation, and other effects.
Adding Music and Audio Synchronization
- Add Background Music:
- Tap Music Icon: Tap the “Music” icon to add background music.
- Choose Track: Select a track from your library or use one of Splice’s royalty-free music options.
- Adjust Volume: Use the volume slider to balance the background music with the video’s original audio.
- Synchronize Audio with Video Clips:
- Drag and Drop: Position the music track in the timeline to sync with video clips.
- Trim and Split Audio: Trim and split the audio track to match the length of your video clips.
Saving and Sharing
How to Save Edited Content
- Save Project: Tap the “Save” button to save your project. You can continue editing later if needed.
- Export Video: When you’re ready to export, tap the “Export” button.
Posting Directly to Social Media and Other Platforms
- Choose Export Settings: Select the desired resolution and format for your video.
- Export and Share:
- Direct Sharing: Tap the social media icons (e.g., Instagram, Facebook, YouTube) to share directly from the app.
- Save to Device: Alternatively, save the video to your device and upload it manually to any platform.
By following these steps, you can effectively use Splice Video Editor to create and share high-quality videos. The intuitive design and powerful features make it easy to produce professional-looking content, whether you’re a beginner or an experienced editor.
Section 8: Tips and Tricks for Maximizing Splice Video Editor
Best Practices for Using Filters and Effects
- Start with Subtle Adjustments: When applying filters and effects, start with subtle changes. Overuse can make your video look unnatural. Gradually increase the intensity to find the right balance.
- Consistency is Key: Use similar filters and effects throughout your video to maintain a consistent look and feel. This is especially important for creating a cohesive style in a series of videos.
- Combine Filters for Unique Looks: Experiment with combining different filters and effects to create a unique visual style. Splice allows you to layer effects, providing endless possibilities for creativity.
Creative Uses for Text Overlays and Transitions
- Highlight Key Points with Text Overlays: Use text overlays to emphasize important information, such as titles, subtitles, or calls to action. Position text strategically to draw viewers’ attention.
- Stylize Your Text: Customize text with different fonts, colors, and styles to match the theme of your video. Use shadow and outline effects to make text stand out against busy backgrounds.
- Smooth Transitions: Apply transitions between clips to ensure a seamless flow. Use simple transitions like fades for a professional look, and save more dynamic transitions for high-energy sections.
- Creative Transitions: Experiment with creative transitions, such as wipes or slides, to add visual interest. Use these sparingly to avoid overwhelming the viewer.
Tips for Maintaining High-Quality Visuals After Editing
- Use High-Resolution Footage: Start with high-resolution footage to ensure the best possible quality in your final video. Low-resolution clips can become pixelated and reduce the overall quality.
- Export Settings: Choose the highest resolution and bitrate settings available when exporting your video. This preserves the quality and ensures your video looks sharp on all devices.
- Avoid Over-Compression: Be mindful of the file size and compression settings. Over-compression can lead to loss of detail and clarity. Balance file size with quality for optimal results.
- Preview Before Exporting: Always preview your video before exporting. Check for any issues like misplaced text, abrupt transitions, or audio sync problems. Make adjustments as needed to ensure a polished final product.
By following these tips and tricks, you can maximize the capabilities of Splice Video Editor and create stunning videos that captivate your audience. Whether you’re adding subtle effects, using text creatively, or ensuring high-quality exports, these best practices will help you produce professional-grade content with ease.
Conclusion
Recap of the Key Points Discussed in the Review and Tutorial
In this review and tutorial, we explored the various features and functionalities of Splice Video Editor. We covered its user-friendly interface, a comprehensive set of editing tools, and seamless integration with GoPro devices. We also discussed its performance, including ease of use, responsiveness during editing, and stability. The pros and cons highlighted its strengths and areas for improvement, while comparisons with other video editing apps showcased where Splice excels and where it falls short. Finally, we provided a step-by-step tutorial and useful tips and tricks to help you get the most out of Splice.
Final Thoughts on the Suitability of Splice for Different Types of Users
Splice Video Editor is an excellent choice for a wide range of users, from beginners to casual video editors and social media enthusiasts. Its intuitive design and robust feature set make it accessible for those new to video editing while still offering enough tools to satisfy more experienced users. The app is particularly well-suited for creating social media content, thanks to its direct sharing options and high-quality filters and effects. However, users seeking advanced editing capabilities may find it lacking compared to professional software.
Call to Action: Encourage Readers to Download Splice and Try It Out for Their Video Editing Projects
We encourage you to download Splice and experience its powerful features for yourself. Whether you’re looking to create stunning videos for social media, edit your latest vlog, or simply enhance your home videos, Splice offers an easy-to-use platform that delivers professional results. Give it a try and unleash your creativity today!
FAQs
Addressing Common Questions About Using Splice
- Q: Is Splice free to use?
- A: Yes, Splice offers a free version with essential features. There is also a premium version available that unlocks additional tools and removes ads.
- Q: Can I use Splice on both iOS and Android devices?
- A: Yes, Splice is available for download on both the App Store for iOS devices and Google Play Store for Android devices.
- Q: Does Splice add a watermark to videos?
- A: The free version of Splice includes a watermark on exported videos. Upgrading to the premium version removes the watermark.
Tips for Troubleshooting Common Issues
- Issue: App Crashes or Freezes
- Solution: Ensure your app is updated to the latest version. Try closing other apps running in the background to free up memory. If the problem persists, reinstall the app.
- Issue: Slow Rendering or Exporting
- Solution: Check your device’s available storage and free up space if necessary. Reducing the resolution or length of the video may also improve performance.
- Issue: Audio Sync Problems
- Solution: Ensure your audio tracks are properly aligned in the timeline. Use the audio synchronization feature to fine-tune the timing.
Recommendations for Additional Resources and Tutorials
- Splice Help Center: Access comprehensive guides and FAQs directly from Splice’s support section within the app.
- YouTube Tutorials: Search for video tutorials on YouTube for visual step-by-step instructions.
- Online Communities: Join forums and social media groups dedicated to video editing to share tips, ask questions, and learn from other users.
This outline provides a comprehensive structure for reviewing Splice Video Editor, ensuring that all essential aspects are covered while optimizing the content for readability and engagement.
See other photography and video editing applications
User Reviews