Discover Avid Pro Tools, the industry-standard music production software. Learn about its key features, benefits, pricing, along with how to download and use it effectively.
- Industry Standard
- Flexible Licensing
- Comprehensive Plugins
- Steep Learning Curve
- Advanced versions are expensive
- Requires a powerful computer

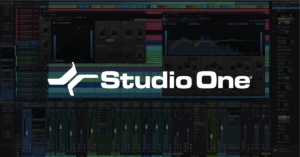
PreSonus Studio One: The Ultimate Music Production Software for Creators
PreSonus Studio One has rapidly become one of the leading digital audio workstations (DAWs) in the music production industry. With a powerful suite of tools, user-friendly interface, and a broad range of features, it caters to both beginners and professional producers. In this guide, we’ll delve into the many facets of PreSonus Studio One, explore how it stacks up against other DAWs like Ableton Live and Cubase, and provide tips on how to maximize your experience with this exceptional software.
Overview
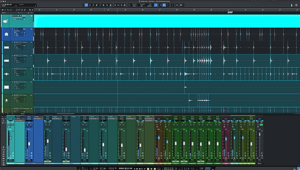
PreSonus Studio One is a versatile DAW designed to streamline the music production process. Whether you’re recording, mixing, mastering, or arranging, Studio One offers an all-in-one solution that integrates smoothly with your workflow. It supports both MIDI and audio tracks, and its intuitive drag-and-drop functionality makes it accessible even to those new to music production. The software comes in various editions, allowing users to choose the version that best suits their needs and budget.
Studio One’s interface is highly customizable, enabling users to tailor their workspace according to their preferences. From the innovative Scratch Pads for trying out different arrangements without affecting the main project to the built-in mastering suite, Studio One is packed with features that set it apart from other DAWs.
Key Features
- Drag-and-Drop Functionality
Studio One’s drag-and-drop feature revolutionizes the way you arrange tracks, effects, and instruments. This intuitive design allows users to simply drag elements from the browser or workspace and drop them directly onto the timeline or mixer. Whether you’re layering instruments, adding effects, or rearranging track sequences, this functionality streamlines the workflow, reducing the time spent on tedious tasks and letting you focus on the creative aspects of music production. The drag-and-drop system is especially beneficial for beginners, as it makes complex processes more accessible and easy to understand. - Advanced MIDI Editing
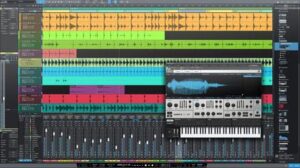
Studio One excels in MIDI editing, offering a wide array of tools that cater to both novice and professional producers. The advanced MIDI editor allows for detailed step recording, precise quantization, and the application of MIDI effects. These features ensure that your compositions are both accurate and flexible, enabling you to achieve the exact sound you’re aiming for. Whether you’re fine-tuning a melody, adjusting note velocities, or experimenting with MIDI effects, Studio One provides the tools you need to perfect your music with precision. - Integrated Mastering Suite
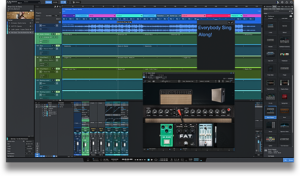
One of Studio One’s standout features is its built-in mastering suite. Unlike many other digital audio workstations (DAWs) that require separate software for mastering, Studio One allows you to finalize your tracks within the same environment where you composed and mixed them. This integrated approach not only saves time but also ensures consistency across your project. The mastering suite includes high-quality plugins for EQ, compression, limiting, and other essential mastering tasks, helping you achieve a polished, professional sound without leaving the DAW. - Scratch Pads
Creativity often involves experimenting with different ideas and arrangements, and Studio One’s Scratch Pads feature is designed to facilitate this process. Scratch Pads provide a separate workspace within your main project where you can test new arrangements, try out different musical ideas, or create alternate versions of your track. The beauty of Scratch Pads is that they allow you to experiment freely without affecting your primary project, making it easy to compare different versions and choose the best one. - Multi-touch Support
For users with touch-enabled devices, Studio One’s multi-touch support adds a new level of interactivity to the music production process. This feature allows you to control various elements of the DAW using touch gestures, making it particularly useful in live performance settings or when working on the go. Multi-touch support enhances the tactile experience, allowing you to mix, arrange, and edit tracks with the same fluidity as using a traditional mixing console. - Extensive Plugin Support
Studio One offers robust support for VST, AU, and ReWire plugins, ensuring compatibility with a vast range of third-party tools and instruments. This extensive plugin support means that you’re not limited to the stock instruments and effects included with the DAW—you can expand your sonic palette with external plugins, whether you’re seeking specialized effects, unique virtual instruments, or advanced mixing tools. This flexibility makes Studio One a versatile platform that can adapt to your specific production needs. - Project Page Integration
Studio One’s Project Page Integration is a feature that ties your entire production workflow together. This integration allows you to seamlessly move between different stages of the production process—composing, recording, mixing, and mastering—without leaving the DAW. The Project Page acts as a central hub, where you can manage and organize your projects, monitor progress, and make adjustments as needed. This holistic approach ensures that your production process is smooth, efficient, and cohesive from start to finish.
Benefits of Using PreSonus Studio One
- Efficiency
One of the primary benefits of using Studio One is its efficiency. The streamlined interface, combined with the powerful drag-and-drop functionality, significantly reduces the time spent on routine tasks. Instead of getting bogged down by technicalities, you can focus more on the creative process, whether you’re composing, mixing, or mastering. The intuitive design ensures that you can quickly navigate the software and complete tasks with minimal effort, making Studio One a valuable tool for both beginners and professionals. - Flexibility
Studio One is designed to be a versatile DAW, capable of handling various aspects of music production. Whether you’re composing complex arrangements, recording live instruments, mixing tracks, or finalizing your project with mastering, Studio One provides a comprehensive set of tools that can adapt to your needs. This flexibility means that you can rely on Studio One throughout your entire production journey, from the initial idea to the final product, without needing to switch between different software. - High-Quality Output
When it comes to the quality of your final product, Studio One does not disappoint. The integrated mastering suite, along with the high-end effects and plugins available within the DAW, ensures that your tracks meet professional standards. Whether you’re working on a single song or a full album, Studio One provides the tools needed to achieve a polished, high-quality sound. The mastering suite, in particular, allows you to fine-tune your tracks with precision, ensuring that your music is ready for release on any platform. - Scalability
Studio One is designed to grow with you as your skills and needs evolve. The DAW offers a range of features that cater to users at different stages of their music production journey. As you progress, you can take advantage of more advanced tools and techniques, such as detailed MIDI editing, advanced mixing options, and integrated mastering capabilities. This scalability ensures that Studio One remains a relevant and powerful tool, whether you’re just starting or are an experienced producer looking for advanced features.
These key features and benefits make PreSonus Studio One a compelling choice for music producers of all levels, offering a comprehensive and flexible platform that can adapt to your creative needs while ensuring high-quality results.
Pricing
PreSonus Studio One is available in several editions, each catering to different levels of users:
- Studio One Prime: A free version with basic features suitable for beginners.
- Studio One Artist: Priced around $99.95, this version offers more tools and functionality for intermediate users.
- Studio One Professional: The full version, priced at $399.95, includes all features, making it ideal for professional producers.
- Crossgrade Pricing: Users of other DAWs can purchase Studio One at a discounted rate, making it a cost-effective switch for those looking to change platforms.
How to Download and Install
To easily download and install PreSonus Studio One, follow these steps:
- Locate the Download Buttons
At the top of this page, you will see buttons labeled “Download now” - Redirect to the Download Page
Clicking on the appropriate button will redirect you to the official PreSonus download page. - Select Your Version
On the download page, you’ll find options to download either the free Studio One Prime or one of the paid versions (Artist, Professional). Choose the version you wish to install. - Create or Log Into Your PreSonus Account
If you don’t already have a PreSonus account, you will need to create one. If you have an account, simply log in. - Download the Installer
After logging in, follow the prompts to download the installer for your selected version of Studio One. - Run the Installer
Once the download is complete, open the installer file on your computer. Follow the on-screen instructions to complete the installation process. - Activate Studio One
After installation, launch Studio One and enter the license key you received to activate the software.
How to Use PreSonus Studio One
Getting started with PreSonus Studio One is easy and intuitive. Follow these steps to set up your workspace, create projects, and produce high-quality music:
- Setting Up Your Workspace
- Open Studio One: Launch the application and familiarize yourself with the interface.
- Customize Layout: Drag and drop various panels (e.g., mixer, browser, arrangement) to arrange your workspace according to your preferences. You can resize and move windows to create a layout that suits your workflow.
- Save Your Workspace: Once you have customized your workspace, save your layout by navigating to View > Workspace > Save Workspace As. This ensures you can quickly return to your preferred setup.
- Creating a New Project
- Start a New Project: Click File > New Project to begin. You’ll be presented with options to select a template or create a blank project.
- Choose a Template: Studio One offers various templates tailored to different types of projects, such as recording sessions, mixing, or mastering. Select a template that matches your needs.
- Blank Project: If you prefer to start from scratch, choose Blank Project. This gives you a clean slate to build your project.
- Recording
- Set Up Tracks: Create audio or MIDI tracks by clicking the Add Track button in the arrangement view. Choose the track type based on whether you’re recording vocals, instruments, or MIDI data.
- Adjust Input Settings: Ensure your audio interface or MIDI device is properly connected and configured. Go to Options > Audio Setup or MIDI Setup to set up your hardware.
- Start Recording: Click the Record button in the transport controls to begin capturing your performance. Studio One’s low-latency engine ensures minimal delay, providing high-quality recordings.
- Monitor Levels: Watch the input levels to avoid clipping and ensure optimal recording quality.
- Editing
- Select the Editing Tool: Use tools from the toolbar such as the Cut, Copy, Paste, and Split tools to edit your tracks.
- Apply Effects: Drag and drop effects from the Browser onto your tracks. Studio One provides a variety of built-in effects and also supports third-party plugins.
- Adjust Timing: Use the Quantize feature for MIDI tracks to correct timing issues and ensure precise rhythm.
- Edit Automation: Add automation lanes to control parameters like volume, panning, and effects over time.
- Mixing
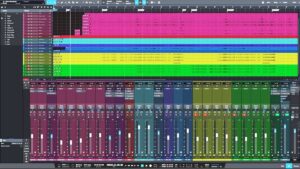
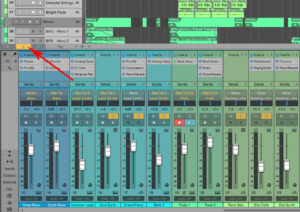
- Open the Mix Console: Click the Mix button to access the Mix Console view. This provides a detailed interface for balancing and processing your tracks.
- Adjust Levels: Use the faders to set the volume levels of each track. Make sure your mix is well-balanced and avoids distortion.
- Apply EQ and Compression: Use the built-in EQ and compressor plugins to refine the sound of each track. You can also add other effects to shape your mix.
- Route Signals: Set up buses and routing to manage the flow of audio signals and apply group processing if needed.
- Mastering
- Open the Project Page: Switch to the Project Page by clicking the Project button. This is where you’ll finalize your tracks.
- Apply Mastering Effects: Use the integrated mastering suite to add final touches to your track. This includes EQ, compression, and limiting to ensure your track meets professional standards.
- Export Your Project: Once you’re satisfied with the mastering, export your project by clicking File > Export > Mixdown. Choose the desired format and quality settings for distribution.
By following these steps, you’ll be able to effectively use PreSonus Studio One to produce, mix, and master your music projects with ease.
How to Maximize Your Experience with PreSonus Studio One
To fully harness the power of PreSonus Studio One and enhance your music production process, consider these practical tips:
- Utilize Keyboard Shortcuts
- Speed Up Workflow: Keyboard shortcuts can greatly increase your efficiency by allowing you to perform common tasks quickly. Familiarize yourself with essential shortcuts such as:
- Play/Pause: Spacebar
- Stop: Spacebar (when playback is active)
- Record: R
- Undo/Redo: Ctrl+Z / Ctrl+Shift+Z (Windows) or Command+Z / Command+Shift+Z (Mac)
- Zoom In/Out: Ctrl+Mouse Wheel (Windows) or Command+Mouse Wheel (Mac)
- Customize Shortcuts: Go to Studio One > Preferences > Keyboard Shortcuts to view and customize shortcuts according to your needs.
- Leverage Third-Party Plugins
- Expand Your Sound Palette: Studio One supports a wide range of VST and AU plugins. Adding third-party plugins can provide additional effects, virtual instruments, and processors that complement the built-in tools.
- Explore Plugin Libraries: Check out popular plugin developers and libraries to find high-quality additions.
- Install Plugins: Install new plugins by placing them in the appropriate folder and scanning for new plugins in Studio One > Options > Locations > VST Plug-Ins.
- Take Advantage of Scratch Pads
- Experiment Freely: Scratch Pads are a powerful feature for experimenting with different arrangements and ideas without altering your main project.
- Create and Use Scratch Pads: Click on the Scratch Pad button in the arrangement view. Create new Scratch Pads by selecting Add Scratch Pad and experiment with variations of your track.
- Compare Arrangements: Easily switch between Scratch Pads and your main project to compare different arrangements and choose the best one.
- Explore Online Tutorials
- Learn Advanced Techniques: Studio One has a robust community and a wealth of online resources, including video tutorials, forums, and user groups. These resources can help you master advanced features and techniques.
- YouTube Channels: Follow popular channels dedicated to Studio One tutorials for practical tips and tricks.
- PreSonus Blog and Forums: Visit the PreSonus blog and community forums for articles, discussions, and user insights.
- Regularly Update Your Software
- Stay Current: PreSonus frequently releases updates that include new features, improvements, and bug fixes. Keeping your software updated ensures you have access to the latest tools and enhancements.
- Check for Updates: Regularly check for updates by going to Studio One > Check for Updates.
- Enable Auto-Update: If available, enable auto-update to receive the latest improvements automatically.
Comparing with Other Music Platforms
Feature | PreSonus Studio One | FL Studio | Ableton Live | Logic Pro X | Cubase |
Drag-and-Drop Functionality | Yes | Yes | Yes | Limited | Yes |
Advanced MIDI Editing | Yes | Yes | Yes | Yes | Yes |
Integrated Mastering Suite | Yes | No | No | Yes | No |
Scratch Pads | Yes | No | No | No | No |
Multi-touch Support | Yes | Limited | Limited | No | Limited |
Extensive Plugin Support | VST, AU, ReWire | VST, AU | VST, AU | AU | VST, AU |
Project Page Integration | Yes | No | No | No | Yes |
Real-Time Audio Stretching | Yes | Yes | Yes | Yes | Yes |
Built-in Virtual Instruments | Yes | Yes | Yes | Yes | Yes |
Price Range | Free to $499 | $99 to $299 | $99 to $749 | $199 | $99 to $579 |
See detail | Add New |
Notable Differences of PreSonus Studio One
- Integrated Mastering Suite:
- PreSonus Studio One: Includes a comprehensive mastering suite integrated directly into the DAW, allowing for finalizing tracks without additional software.
- Others: Most other DAWs like Ableton Live, FL Studio, and Cubase require separate mastering plugins or software.
- Scratch Pads:
- PreSonus Studio One: Features Scratch Pads that let you experiment with different arrangements and ideas without affecting your main project. This fosters creativity and flexibility.
- Others: DAWs like Ableton Live and FL Studio do not have a similar feature.
- Multi-touch Support:
- PreSonus Studio One: Offers robust multi-touch support, enhancing the user experience on touch-enabled devices.
- Others: Ableton Live and FL Studio provide limited multi-touch functionality, while Logic Pro X and Cubase do not support it as extensively.
- Project Page Integration:
- PreSonus Studio One: Provides a Project Page for seamless integration between different stages of music production, from mixing to mastering.
- Others: Ableton Live and FL Studio lack this integrated feature, requiring separate tools for project finalization.
- Drag-and-Drop Functionality:
- PreSonus Studio One: Offers extensive drag-and-drop functionality for arranging tracks, effects, and instruments, which simplifies the workflow.
- Others: While Ableton Live, FL Studio, and Cubase also offer drag-and-drop features, the implementation in Studio One is noted for its ease of use.
PreSonus Studio One distinguishes itself with its integrated mastering suite, innovative Scratch Pads feature, and advanced multi-touch support, making it a versatile and efficient choice for music producers.
Ableton Live vs. PreSonus Studio One:
- Workflow: Ableton Live is known for its unique Session View, which is great for live performances, while Studio One’s linear arrangement is more suited for traditional studio production.
- MIDI Editing: Studio One offers more advanced MIDI editing features compared to Ableton Live, making it a better choice for intricate compositions.
- User Interface: Studio One’s interface is more customizable and intuitive for new users, while Ableton Live’s interface is optimized for speed and live manipulation.
Cubase vs. PreSonus Studio One:
- Feature Set: Both DAWs offer similar features, but Studio One’s integrated mastering suite gives it an edge for users who want an all-in-one solution.
- Price: Cubase tends to be more expensive, making Studio One a more budget-friendly option with comparable features.
User Reviews: Pros, Cons, and My Personal Review
Pros
- Intuitive Drag-and-Drop Interface
PreSonus Studio One is renowned for its user-friendly drag-and-drop interface, which simplifies the workflow by allowing users to easily arrange tracks, effects, and instruments. This intuitive design helps streamline the music production process, making it accessible even for beginners. - Comprehensive Feature Set, Including Mastering Tools
Studio One stands out with its all-in-one approach, offering a complete range of features from recording and editing to mixing and mastering. The integrated mastering suite is particularly noteworthy, as it eliminates the need for external software and provides high-quality tools for finalizing tracks. - Excellent Plugin Support and Compatibility
The DAW supports a wide range of plugins, including VST, AU, and ReWire formats. This extensive compatibility ensures that users can incorporate various third-party tools and virtual instruments into their projects, enhancing their creative options and sound palette.
Cons
- Steep Learning Curve for Advanced Features
While Studio One is generally user-friendly, some users may find the learning curve challenging when delving into its more advanced features. Mastering the full range of capabilities, especially for complex projects, may require additional time and effort. - Higher System Requirements Compared to Other DAWs
Studio One demands relatively high system resources, which can be a concern for users with older or less powerful hardware. This higher requirement can impact performance and necessitate more robust computing power to ensure smooth operation.
Personal Review
As a user of PreSonus Studio One, I have found it to be a robust and versatile tool for music production. Its intuitive drag-and-drop interface is a standout feature, making it easy to start creating music right away. The comprehensive feature set, including the integrated mastering tools, provides a seamless workflow from recording to finalizing tracks, which is incredibly convenient.
Despite its user-friendly nature, Studio One does present a steep learning curve when exploring its more advanced capabilities. However, the depth and flexibility it offers in return are well worth the investment of time. Additionally, the higher system requirements are something to consider, especially if you’re working with older equipment.
Overall, PreSonus Studio One strikes an excellent balance between functionality and ease of use. It caters well to both beginners and experienced professionals, providing powerful tools and an intuitive interface that make it a top choice for a wide range of music production needs.
Troubleshooting Common Issues in PreSonus Studio One
Here are detailed solutions to common issues you may encounter while using PreSonus Studio One:
1. Installation Errors
- Verify System Requirements:
- Check Compatibility: Ensure that your computer meets the minimum system requirements for Studio One. These requirements can be found on the PreSonus website or in the installation guide. Typical requirements include specific versions of Windows or macOS, processor speed, RAM, and disk space.
- System Updates: Make sure your operating system is up to date with the latest patches and updates. Outdated OS versions can sometimes cause compatibility issues during installation.
- Update Drivers:
- Audio Interface Drivers: Ensure that you have the latest drivers for your audio interface. Outdated or incompatible drivers can cause installation issues or affect the performance of the software.
- Graphics Drivers: Check that your graphics card drivers are up to date. Incompatible or outdated graphics drivers can sometimes lead to problems with the Studio One interface.
- Run as Administrator:
- Installation Rights: On Windows, right-click the Studio One installer and select “Run as administrator.” This can resolve issues related to insufficient permissions during installation.
- Check for Installation Errors:
- Error Messages: Pay attention to any error messages displayed during installation. These messages can provide clues about what might be going wrong and can often be searched for specific solutions online.
2. Audio Latency
- Adjust Buffer Size:
- Open Audio Settings: Navigate to Studio One > Options > Audio Setup (Windows) or Studio One > Preferences > Audio Setup (Mac).
- Buffer Size Setting: In the audio settings window, look for the buffer size or latency setting. Lowering the buffer size reduces latency but may increase the load on your CPU. Conversely, increasing the buffer size reduces CPU load but increases latency. Adjust this setting to find a balance that works for your system.
- Optimize System Performance:
- Background Processes: Close unnecessary background applications to free up system resources.
- Audio Interface Settings: Ensure your audio interface settings are optimized for low latency. Check the manufacturer’s documentation for recommended settings.
- Update Audio Drivers:
- Driver Updates: Check for updates to your audio interface drivers. Manufacturers often release updates that improve performance and compatibility.
3. Plugin Compatibility
- Check for Plugin Updates:
- Visit Plugin Manufacturer’s Website: Go to the website of the plugin developer to check if there are updates available for the plugin.
- Update Software: Download and install any updates to ensure compatibility with the latest version of Studio One.
- Try Different Plugin Formats:
- VST vs. AU: If a plugin is not working, try running it in a different format. For example, if you are using a VST plugin and it’s causing issues, try using the AU version (or vice versa) if available. You can manage plugin formats in Studio One > Options > Locations > VST Plug-Ins.
- Check Plugin Installation:
- Verify Installation Paths: Ensure that the plugin is installed in the correct directory that Studio One scans for plugins. You can set or modify plugin directories in Studio One > Options > Locations > VST Plug-Ins.
- Rescan Plugins:
- Rescan Plugin Directory: In the plugin manager, initiate a rescan to detect newly installed or updated plugins. This can be done in Studio One > Options > Locations > VST Plug-Ins > Rescan.
By addressing these common issues with the detailed troubleshooting steps provided, you can resolve many of the typical problems encountered with PreSonus Studio One and ensure a smoother music production experience.
Frequently Asked Questions (FAQs)
Q1: How much is PreSonus Studio One?
A1: The pricing ranges from $0 for the Prime version to $399.95 for the Professional version.
Q2: How to connect a MIDI keyboard to PreSonus Studio One?
A2: Connect your MIDI keyboard via USB or MIDI interface, then configure it in Studio One’s external devices settings.
Q3: Is there a free version of PreSonus Studio One?
A3: Yes, Studio One Prime is the free version with basic features suitable for beginners.
Q4: Can I use third-party plugins with Studio One?
A4: Yes, Studio One supports VST, AU, and ReWire plugins.
Q5: How to download PreSonus Studio One?
A5: Download it from the official PreSonus website and follow the installation instructions.
Conclusion
PreSonus Studio One is a powerhouse DAW that offers something for everyone, from beginners to professional producers. Its blend of intuitive design, advanced features, and comprehensive tools makes it an excellent choice for anyone serious about music production. Whether you’re considering switching from another DAW or starting fresh, Studio One provides a compelling package. Ready to elevate your music production? Download PreSonus Studio One today and experience the difference.
User Reviews