How to Place Blocks in Minecraft
Placing blocks in Minecraft is one of the game’s core mechanics, allowing players to build, craft, and explore endless possibilities. Whether you’re constructing a cozy home, designing intricate redstone systems, or creating massive sculptures, mastering block placement is essential. This guide will take you through the basics, advanced techniques, and tips on How to place blocks in Minecraft and even hHow to replace blocks in Minecraft.
Highlights
- Step-by-step instructions for placing blocks in Minecraft.
- Advanced tips for building efficiently and creatively.
- Learn how to replace and reorient blocks effectively.
Basics of Block Placement in Minecraft
– Equip the Block
- Access Your Inventory:
Open your inventory by pressing E (on PC) or the corresponding button for your platform. This displays all the items you’ve collected. - Move the Block to Your Hotbar:
Drag the block you want to use from your inventory into the hotbar at the bottom of the screen. The hotbar allows quick access to frequently used items. - Select the Block from the Hotbar:
Use the scroll wheel (PC) or directional keys/buttons (on consoles or mobile) to highlight the block you wish to place.
– Aim at the Target Location
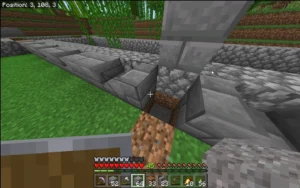
- Move Your Crosshair:
The crosshair, displayed in the center of the screen, acts as your pointer. Move it to the surface where you want to place the block. - Ensure Proper Alignment:
- The targeted block face will highlight slightly, helping you visualize the exact placement.
- Aim carefully to avoid placing blocks in unintended spots, especially when building intricate designs.
- Adjust Perspective if Necessary:
- Use the mouse or right analog stick to adjust your view for precise angles.
- In tight spaces, crouch (hold Shift on PC or equivalent) to prevent accidental interactions with nearby objects.
– Place the Block
- Press the Placement Button:
The input varies depending on your platform:- PC: Right-click with your mouse.
- Mobile: Tap and hold on the screen where you want the block to appear.
- Console: Press the left trigger (LT) or its equivalent button.
- Observe the Block’s Placement:
- The block will appear immediately in the target location.
- If the block doesn’t place, ensure there is adequate space and that it isn’t obstructed.
- Adjust if Necessary:
- For blocks like stairs or logs, their orientation depends on where you aimed. Experiment to achieve the desired direction.
Placing Blocks in Different Modes
– Placing Blocks in Survival Mode
- Resource Requirements:
- Blocks must be collected before they can be placed.
- For example, to place stone blocks, you first need to mine stone using a pickaxe. Similarly, wood must be chopped from trees.
- Limited Placement Range:
- Players can only place blocks within a 5-block radius.
- You’ll need to position yourself close enough to the desired spot.
- Building with Gravity-Affected Blocks:
- Blocks like sand and gravel obey gravity. If placed without support, they will fall until they rest on a solid surface.
- Tip: Use temporary blocks like dirt or cobblestone as support to place these materials at specific heights.
- Efficient Block Management:
- Misplaced blocks can waste resources, as breaking them again may not always yield the original block (e.g., glass shatters unless you use Silk Touch).
- Plan your build carefully to avoid unnecessary losses.
Placing Blocks in Creative Mode
- Unlimited Resources:
- All blocks are available in your inventory without the need to gather materials.
- Access the Creative inventory by pressing E (on PC) or the corresponding key on your platform.
- Instant Placement and Breaking:
- Blocks are placed instantly when you right-click (or the equivalent action).
- Breaking blocks is just as quick, with no tools required.
- Build Anywhere:
- There are no reach restrictions; you can place blocks at any distance as long as they are in your line of sight.
- This makes Creative mode ideal for large-scale projects or experimenting with designs.
- Flying for Easier Placement:
- Flying enables you to hover and place blocks at any height or angle.
- Activate flight by double-tapping the jump key (on PC) or the equivalent button on your console.
Understanding Block Placement Mechanics in Minecraft
– Orientation and Direction
- Directional Blocks:
- Certain blocks, like stairs, logs, pistons, and observers, are directional, meaning their placement changes based on where and how you aim.
- Example: Placing a log while looking at the side of another block will orient the log horizontally. Looking at the top will place it vertically.
- Rotational Adjustments:
- Experiment with placement angles to achieve the desired block orientation. This is particularly important for aesthetic builds or functional designs like redstone circuits.
– Support Requirements
- Solid Surfaces:
- Most blocks require a solid surface to attach to. Examples include stone, dirt, and wood.
- Gravity-Affected Blocks:
- Blocks like sand, gravel, and concrete powder will fall unless placed on a solid foundation. Without support, they drop until they land on a stable surface.
- Exceptions:
- Some blocks, such as torches, ladders, and buttons, attach only to specific block faces.
– Reach and Placement Range
- Player Reach:
- Blocks can only be placed within a 5-block radius from the player.
- Positioning for Precision:
- For distant or elevated placements, use scaffolding or temporary blocks to get closer.
- Creative Mode Exception:
- In Creative mode, there are no placement range restrictions as long as the target is within the player’s line of sight.
– Collision and Bounding Boxes
- Understanding Block Sizes:
- Most blocks occupy a full 1x1x1 cube, but some, like slabs, stairs, or fences, have partial or unique shapes.
- Bounding Box Impact:
- The bounding box determines how blocks interact with players and entities, affecting movement, collision, and placement angles.
– Special Placement Interactions
- Sneak Placement:
- Sneaking (holding Shift on PC or the equivalent key) allows you to place blocks near interactable objects like chests, furnaces, or doors without opening or activating them.
- Edge Placement:
- Aim at the edge or corner of a block to place blocks diagonally or in tricky spots.
How Do You Replace Blocks in Minecraft?
1. Replacing Blocks Manually
Manual replacement is the most straightforward way to replace blocks, often used in Survival mode. Here’s how:
Step 1: Break the Existing Block
- Equip the correct tool for the block type to break it efficiently:
- Pickaxe: For stone, ores, and similar blocks.
- Axe: For wood-based blocks.
- Shovel: For dirt, sand, and gravel.
- Ensure your tool has the necessary enchantments, such as Silk Touch (to collect the exact block) or Efficiency (for faster mining).
Step 2: Place the New Block
- Select the replacement block from your hotbar.
- Aim at the desired location and place it using the appropriate action for your platform:
- PC: Right-click.
- Mobile: Tap and hold.
- Console: Use the left trigger (LT) or equivalent.
2. Using the Fill Command to Replace Blocks
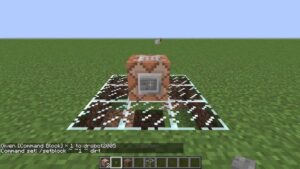
For larger projects, the /fill command is a powerful way to replace blocks quickly and efficiently. This method is typically used in Creative mode or when cheats are enabled.
Step 1: Open the Chat Window
- Press T (on PC) or the chat button for your platform.
Step 2: Input the Command
The basic syntax for replacing blocks is:
/fill [x1] [y1] [z1] [x2] [y2] [z2] [block_to_replace] [replacement_block]
- Replace:
- [x1] [y1] [z1] and [x2] [y2] [z2]: The coordinates defining the area.
- [block_to_replace]: The block currently in the area.
- [replacement_block]: The new block you want to place.
Example:
Replace all dirt in a 10×10 area with stone:
/fill ~0 ~0 ~0 ~10 ~10 ~10 dirt stone
3. Replacing Blocks Using Clone Command
If you need to copy and replace blocks from one location to another, the /clone command is helpful:
Step 1: Define the Source Area
- Determine the coordinates of the area you want to copy.
Step 2: Define the Destination
- Identify where you want the copied blocks to be placed.
Step 3: Use the Command
The syntax is:
/clone [x1] [y1] [z1] [x2] [y2] [z2] [destination_x] [destination_y] [destination_z] [replace]
- Replace:
- [x1] [y1] [z1] and [x2] [y2] [z2]: Source area coordinates.
- [destination_x] [destination_y] [destination_z]: Where the blocks will be replaced.
Tips for Efficient Building in Minecraft
– Plan Your Build
- Sketch Your Design:
- Draw your ideas on paper or use tools like Minecraft Blueprint Makers or WorldEdit for pre-planning.
- Choose Materials Wisely:
- Select blocks that are easy to gather in Survival mode or match your desired aesthetic in Creative mode.
- Test in Creative Mode:
- Experiment with your design in Creative mode to perfect it before implementing it in Survival mode.
– Organize Your Resources
- Gather Materials in Advance:
- Collect all necessary blocks, tools, and items before starting to avoid interruptions.
- Use Shulker Boxes or Chests:
- Keep your inventory organized by storing building materials in portable shulker boxes or nearby chests
– Use caffolding for Complex Builds
- Easy Vertical Access:
- Scaffolding blocks allow you to build tall structures and easily climb up or down.
- Quick Removal:
- Breaking the base of scaffolding collapses the entire structure, saving time during cleanup.
– Leverage Temporary Blocks
- Support Structures:
- Use expendable blocks like dirt or cobblestone as placeholders for tricky placements or floating builds.
- Easy Removal:
- Choose materials that are easy to break or that you don’t mind losing.
– Optimize Block Placement
- Sneak Placement:
- Hold the sneak key (Shift on PC) to place blocks without interacting with adjacent objects like doors or chests.
- Diagonal and Edge Placement:
- Aim at the edge of existing blocks for more precise placement, especially when building bridges or roofs.
– Practice in Creative Mode
- Experiment Freely:
- Creative mode allows unlimited resources and instant placement, making it ideal for testing designs.
- Fly for Better Perspective:
- Flying lets you see your structure from all angles and make adjustments as needed.
Conclusion
Placing blocks in Minecraft is a fundamental skill that fuels creativity and innovation, allowing players to design anything from simple homes to elaborate structures and redstone machines. By mastering both the basics and advanced techniques, you can bring your imagination to life and enhance your gameplay. With the tips and solutions provided in this guide, you’re ready to build smarter, faster, and better in your Minecraft adventures.
Ready to transform your Minecraft builds? Start practicing your block placement skills today and take your creativity to new heights. For more expert tips, guides, and inspiration, follow APKAFE and stay updated on the latest Minecraft techniques. Your dream world is just a few blocks away—start building now!
User Reviews


