HOW TO RESET KODI AND CLEAR CACHE IN KODI
Want to find the best way to clear cache in Kodi or reset Kodi? How can you do that? Read the article below for more details!
I. How to reset Kodi
1. On Windows
• Close Kodi on your Windows computer.
• In the PC Search Bar, enter the following exactly: % appdata%, and select File, as below:
• When it opens, you will see Kodi.
• Right-click on Kodi and select Delete.
• Kodi is now back to factory settings.
This is the easiest and fastest way to uninstall any add-ons or builds in Kodi. When Kodi is reopened, it should now look like this:

After you reset Kodi, you can install all your favorite gadgets and builds.
2. On the Fire TV device
Step 1
Close Kodi on Fire TV if you’re in it by clicking Exit. You will be redirected to the main screen of Fire TV or Fire TV Stick.
Step 2
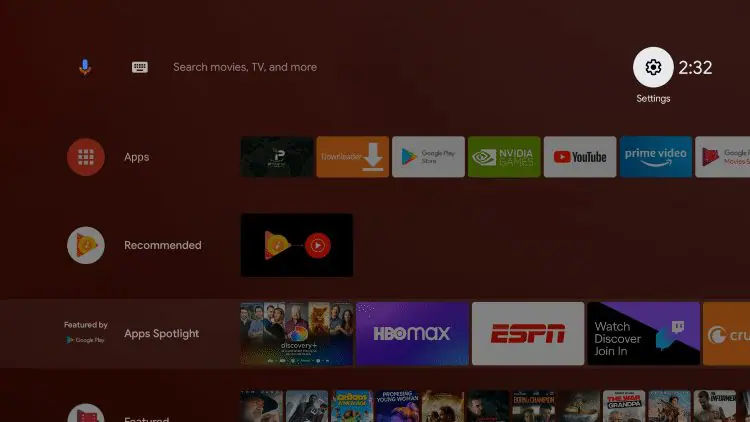
On the remote, press Home.
Step 3
Go to the Settings tab and then click the Navigate down button.
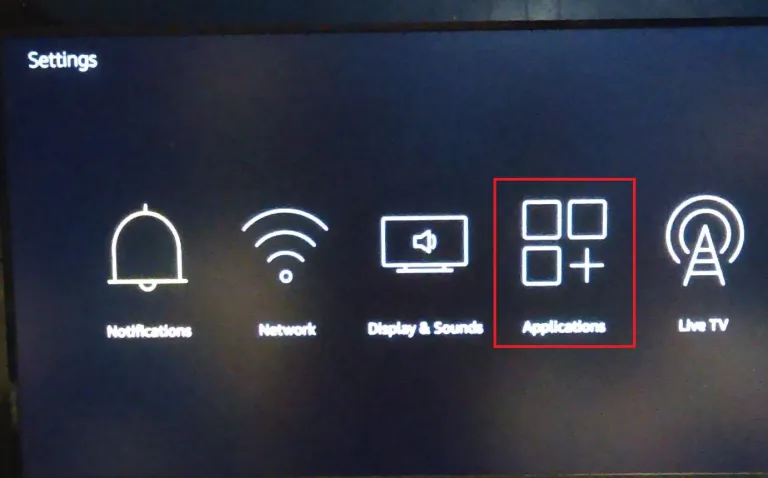
Step 4
Scroll through and click on Applications.
Step 5
Scroll down with the remote control’s navigation button and select Manage installed applications.
Step 6
Scroll down and select Kodi from the list. The application’s setup menu will be displayed.
NOTE: To ensure the application has stopped, select Force stop.
Step 7
Scroll down and select Clear data.
NOTE: When you select Clear data, all your data (add-ons, settings, files, accounts, and databases) on your Kodi will be permanently deleted, and you will be returned to the factory reset of the application.
Step 8
Select Clear data again to confirm.
You will notice that the value displayed under Size is now reduced.
Step 9
Press your remote Home button.
Step 10
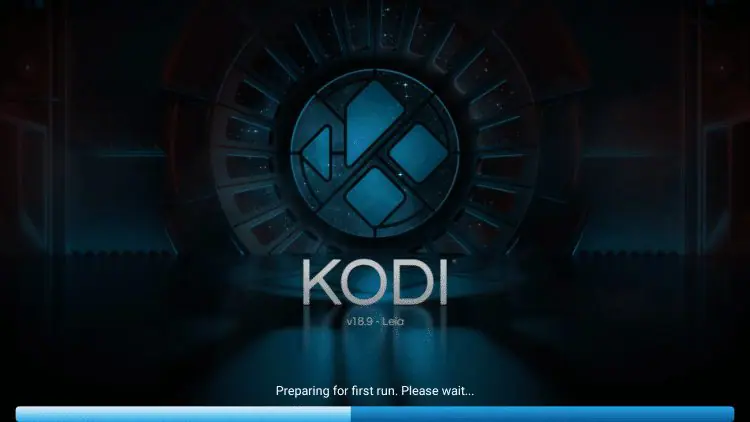
Hover on Kodi and launch the application.
You notice the application will be prepared similarly to what was done when you installed Kodi for the first time.
Step 11
Confirm that Kodi has been reset to factory defaults. It will display the following message:
Step 12
Reinstall your favorite Kodi gadgets, themes, and settings on Fire TV or Fire TV Stick.
3. On Android TV Box
Step 1
Exit Kodi if you already have it open.
Step 2
On the home screen, click Settings.
Step 3
In Options, click More Settings.
Step 4
In Device, click Application.
Step 5
From the list of applications, select Kodi.
Step 6
The total data currently installed in Kodi will be displayed. Select DATA. Let it go through the process of computer space, deletion, etc. This may take a minute.
NOTE: When you choose CLEAR DATA, all your data (add-ons, settings, files, accounts, and databases) on your Kodi will be permanently deleted, and you will be returned to the factory reset of the application.
Step 7
You will be warned that this command will permanently delete all data on Kodi. Click OK.
Step 8
The data size will now be zero.
Step 9
Press Escape to return to the main screen.
Step 10
Launch Kodi and make sure everything is erased, and you’re working on a fresh install.
Step 11
You will see the application will be prepared similarly to what was done when you installed Kodi for the first time.
Step 12
Confirm that Kodi has been reset to factory defaults.
II. How to clear cache in Kodi
1. By Super Repo
Open Kodi> Click Settings (located at the top)> Go to File Manager> Then double click Add source.
Click on the message ‘No’> Enter URL> Click OK> Enter Media source name ‘Superrepo’> Click OK.
Click ‘Backspace’ repeatedly to return to Kodi’s Main Menu> Now, click on Utilities> Then, click on Package Installer (Located in the top left corner).
Select Install from Zip File> Click superrepo> Then, click Krypton> Repository> Superrepo.
Click ‘superrepo.kodi.krypton.reposearies-0.7.04.zip’ and wait for the zip file to be installed.
Now, select Install from Repository> Select SuperRepo Repository [Krypton] [V7]> Add-in Repository> Select SuperRepo All [Krypton [V7]> Click Install> Wait until the add-ons is enabled.
Back to Add-ons > Click the Box icon> Click Install from Repository> Click SuperRepo All [Krypton] [v7]> Program Add-ons > Click Merlin Repository> Now click Submit Merlin Wizard (Sometimes when the Merlin Wizard box appears, simply click Open Merlin Wiard from that box).
Go to Toolbox (located in the top menu)> At the bottom, you’ll see different options, but the most important ones are 3 options: Clear cache, Delete packages, and Delete thumbnails. Each option will have its own space below. Click on all 3 options to free up unnecessary space.
Click Exit when you have cleared Cache, deleted the Packages, and deleted Thumbnails.
Congratulations! You have just cleared cache in Kodi. Now, enjoy pausing for free video playback! Remember that video streaming also depends on several factors, including your internet connection, WI-FI connection, ISP adjustment, etc.
2. By Ares Wizard
Open Kodi > Click the gear icon (Settings) found in the top menu> Click File Manager.
Click Add Source> Click <No>. Enter the URL http://areswizard.uk/ and click OK.
Name this source ‘Ares’> click OK> Click OK, again.
Click Utilities> Click the Box icon at the top of the left column.
Click Install from zip file> click Ares> Click “repository.aresproject-0.1.0.zip”
Wait for the notification> Click Install from the Repository.
Click Project Ares.
Now, go to Add-ons> Choose Ares Wizard> Click Install.
Open Ares Wizard after installation.
Go to Maintenance on the top menu> Now, click on Clear Cache \ Delete Packages / Delete Thumbnails > Cache will be cleared.
3. By Jarvis Version 16 and below
Open Kodi Jarvis> Then, click the System menu in front of your screen> Now, select File Manager> Double click Add source at the bottom.
When you click Add source, a box will appear soon where you need to click on ‘No’ and enter http://srp.nu/> Click Done> Enter URL name under ‘Super Repo’> Click Done> Then, click OK.
When you’re done, return to Kodi’s Main Menu by pressing ‘Esc’ on the keyboard> Go to System> Then, select Utilities> Then, click Install from Zip File> Superrepo> Then, Select Jarvis> Click Repository> Superrepo> superrepo.repo.0704.zip.
Now, select Settings from Repository> Then, Super Repo Repository [Jarvis] [v6]> Go to Additional Repository> Select SuperRepo All Repositories [Jarvis] [v6]> Click Install .
Return to the two steps and click Install from Repository> SuperRepo All Repository [Jarvis] [v6]> Program Add-ons> Merlin Instructions> Install
Open Merlin Wizard, go Toolbox> Here, you will see 3 options: Clear cache, Delete packages, and Delete thumbnails. The space that each of these options consumes is also listed below.
4. By Covenant Add-on
Open Kodi> Go to Add-ons> Go to Video Utilities> Open Covenant.
Go to the Main Menu> Open Tools.
Now, click Clear cache and Delete provider> Click Yes> ‘Complete process’ message will appear.
It is an easy way to clear cache in Kodi.
5. By using direct manual method
To clear cache in Kodi, you will need an archive. If not, you cannot clear cache in Kodi. If you want a direct method, then here is a brief guide for you.
Follow these steps to clear cache in Kodi:
Download the Super Repo Zip file on your device.
Open Kodi> Click Utilities> Click the box icon in the top left corner.
Select Install from Zip File> Here, you need to Navigate the downloaded Zip File> It will take some time to install.
Click Install from Repository> Select SuperRepo Repository [Krypton] [V7].
Click the Add-in repository.
Click on SuperRepo All [Krypton [V7].
Click Settings> Wait for the add-in to be installed.
Open the Utilities menu> Click the Box icon.
Click Install from Repository> Click SuperRepo All [Krypton] [v7]> Click Program Add-ons
Click Merlin Repository> Choose Merlin Wizard from the list> Click Install.
Open Program Add-ons> Select Merlin Wizard> Go to Toolbox> Click Clear Cache.
Now, you can enjoy fast streams without any lag. Enjoy!
6. By Exodus Kodi Addon
Video buffers in the Exodus add-in can sometimes be time-consuming, which can be very frustrating. You may feel less interested in watching movies and TV shows when buffering takes a lot of time. However, you can overcome these problems by clearing cache in Exodus Kodi. Here are the steps to follow:
Once you have installed Exodus on Kodi, go to the Kodi Main Menu
Go to Add-on> Video Add-ons> Click on Exodus.
Here you will see many options, including Movies, TV shows, but you have to click on Tools.
Now, look at below, you will find two options, which are Exodus: Clear Providers and Exodus: Clear Cache. Click on both of these options and delete everything. You can now watch videos without buffers.
So, you have reset the Kodi and clear cache in Kodi already.
Good luck!
User Reviews