How to change DNS on Android
The article will instruct you on how to change DNS on Android phones and benefits you may earn from doing so.
Benefits of changing DNS on your phone or computer
>>HOW TO ANDROID FILE TRANSFER
>>HOW TO DISABLE OK GOOGLE ON ANDROID
1. Improve the network speed
Third-party DNS servers can provide users with faster network access than default DNS servers. However, it is not guaranteed because it depends on the location of the user (the closer a proper DNS server is, the faster the access will be) and the status of the home DNS server.

2. Many significant improvements
When the Internet service provider cannot keep the DNS servers running quickly and stably, the user may experience a “dead time.” For example, the web page fails to load or loads very slowly because the DNS takes a while to resolve. If the user’s Internet service provider does not respond well to these tasks, users can switch to a third-party DNS server, which provides them with a more reliable experience.
3. Fraud prevention
OpenDNS also uses filters to block phishing sites, helping you minimize the sticking of viruses or malware when using the Internet.
4. Access the content locked by region or IP block

There is some country-restricted content, or some websites restrict IP addresses by region. When you use DNS of a third party (the party that the websites do not block), you can still visit those websites.
How to change DNS on Android for mobiles data
First, to change DNS on Android, you access the Settings.
Then you go to Connect, where there is a Wifi connection setting.
Here, you see the access point that your Android phone is connecting to.
Press and hold the name of the Wifi access point for 2 seconds, and a window will appear, select Manage network settings.
Then switch DHCP to Static.
Scroll down to the bottom, and you will see DNS 1 and DNS 2.
You can change the DNS into any sequence you like. In the picture is Google’s DNS.
How to change DNS on Android without root
You can change DNS servers on your Android device even without having root permissions but you will be restricted to affecting only your Wifi networks and not 3G or 4G data connections.
In order to do so, follow these steps:
- Go to your device settings
- Select Wifi options
- Tap and hold your connected Wifi network and choose “Modify Network”
- Tap on “Show Advanced Options” box
- Change your “IP Settings” to “Static”
- Add your desired DNS server addresses under the DNS 1 and DNS 2 fields
- Tap “Save”, disconnect and reconnect to that Wifi network to get changes.
How to change DNS on Android Pixel 3
Step 1. Swipe down notifications panel twice from top of the screen and tap Settings gear icon
Step 2. Tap Network and Internet
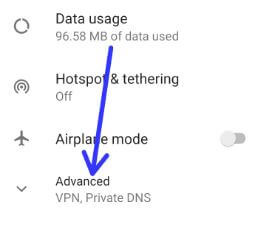
Step 3. Tap Advanced at the end of the page
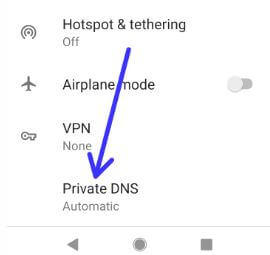
Step 4. Scroll down up to end and tap Private DNS

By default Google Private DNS mode set as automatic.
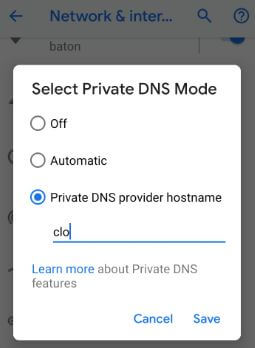
Step 5. Choose Private DNS provider hostname
Step 6. Enter hostname of DNS provider and Tap Save
So, you have changed DNS on Android successfully. In some cases, your browsing speed will be significantly improved. I hope you will be successful!
User Reviews